Showing posts with label Fi. Show all posts

Tuesday, January 25, 2011

Step Fifty Two: A not so 'grand' finale!

Dearest Sylwi


What can I say, except, "Oh. Dear!" ha ha ha ha ha ha! :-)

I guess I should have known that today would turn out like this. Not only have I not had time to plan what I was going to do for the "grand finale", neither did I have time to shop for materials. So, when I sat down this morning to create my last post, I drew a complete blank. I had nothing! Panic!

An hour later and I still had no idea, but really liked the look of this adorable tutorial, by Lynn Roberts. She made the cutest little birdie, complete with a tiny heart, peeping out from his front pocket. 

I really, really wanted to make one for you, as a little present to say thank you for being you and for sharing so much on this blog for the past year.

There is no way, back at the beginning, that I could have realised how much of an impact this blog would have on me, or how much I would enjoy meeting here every week. I feel so privileged to have been able to share this space with you and been given an insight into your art and mind through it.

As an added bonus, I feel like creativity has become a part of my everyday life. I'm constantly dreaming of new projects and stockpiling ideas... and for once, the ideas happen and 'things' get created, rather than drifting around in my head, or being entirely forgotten.

So, thank you, thank you!

Back to my last disaster Step.

:-)

You would have thought I would have learned by now, that I should make sure I have all of the materials before I begin a project.

Uh. Not so.

I DES-perately wanted some cute material to work with, but I had nothing. Not even any cute dresses I could cut up! heee! I really was getting that desperate! :-) I was cursing the decision I made at the end of last year, when I visited Liberty's in London and decided not to buy a bunch of beautiful fabric scraps to use for craft projects. I KNEW I would be able to use them somehow, but had just gone through a big decluttering phase and was trying to keep the amount of "stuff" I had to a minimum. So, I didn't buy them.

Dumbest. Decision. Ever. :-)

So today, I ended up using fabric scraps and a beautiful, cashmere sweater that was given to me that I've never worn. And, well, the project slowly went from horrible to worse! I'm not even going to get into the nightmare I discovered when trying to sew the knitted jersey - it just took on a life of its own... or how I messed up the heart to the point where I had to blanket stitch around the edge to hide the holes... ha ha! 


So, I have decided dearest Sylwi, that I am using today as a "test run" and that I shall buy some fabric especially for this project and make you a sweet and beautiful bird; a gift that I can be proud of giving and one that you won't feel like you have to hide in your bottom drawer (or conveniently lose in the trash can!) :-))))

Let's call it "abstract, modern art" and leave it at that! ;-)
And, in the pocket next to the heart, there's a little note! I wanted to use the letters S.Y.L.W.I. somehow, but sewing them seemed a little advanced in light of my other sewing disasters today... so, I began thinking of adjectives that describe you beginning with those letters ... but I couldn't think for the life of me of anything beginning with 'Y'... yellow... yearbook... yodel... yak... ! Eek! :-) "Youthful" will have to do! ha ha! 


soulful, senTimental, wonderful, sensual, warm, serene, sincere, wondrous, sacred, youtHful, strong, soft, legendary, sweet, intuitive, loveAble, sexy, special, integrity (what on earth is the adjective for integrity?!), lumiNous, lustrous, sparKling, wise, legacy-leaver, womanlY, saintly, inspiratiOnal, innovative, independent, indUstrious, spiritual, intellectual and a true superwoman!

Lots and lots of love to you,
Fi
xx

Tuesday, January 18, 2011

Step Fifty One: Revenge of the Mutant Crochet Flowers...

Dearest Sylwi,

Step Fifty ONE??! Eek! I'm excited and a bit sad it's coming to an end. :-)

Whilst I was creating my Step today, I began to wonder how on earth I am going to find the motivation to create anything, once these 'Fifty Two Steps' finish next week?

I've stumbled and tripped my way through this year, experimenting and playing, but only because I had a weekly deadline and rendez-vous with you. Without you, I would have let every excuse get in the way of making time for being creative.

I really don't know what this next year is going to be like; whether I'll continue experimenting, or if I'll let things slide and rarely break out the art materials. I know I've done one thing this year, though - I've certainly conquered my fear of creating things... I've learned to block out that voice in my head, the one that used to make me give up on an idea, before I even began.

Although, today, maybe I should have listened to that voice! heee! ;-)

With only two Steps left, I knew one of them had to be an attempt at crochet. I tried it before for a Step, but  it was such a disaster, I couldn't bring myself to post the pictures. Ha! Today though, I was determined to post whatever the results turned out to be.

Using a little pamphlet on crochet that my Mum gave me a couple of years ago, I learned how to do a basic chain stitch.


That bit seemed simple enough, so I (foolishly) :-) decided I needed something more challenging to post.

So, I searched for crochet flower tutorials on YouTube. None of the tutorials there were basic enough, so I ended up having to ping back and forth between several different tutorials, to try and work out how on earth to make the flowers. I guess it didn't help that the tutorials were for different types of flowers. (ahem!)


I was dissatisfied with the first flower I made, so I made another... and then another ... annnnd another...

Each one was as bad as the last, but for a different reason. :-)

I decided on one last attempt. One last flower. I would concentrate really, really hard and surely it would turn out perfect?!?


... or not.

*long sigh*

ha ha ha ha ha ha! :-)

See you back here next week, for one last Step. {sob}! ;-)

Lots and lots of love
Fi
xx

Tuesday, January 11, 2011

Step Fifty: Zenpatterndoodles ;-)

Dearest Sylwi,

Yikes! Step Fifty?! :-)

{... and actually, I'm even closer to the finish than that! This is really Step Fifty One, as I'm still missing a post from a couple of weeks ago!}

Today, I needed to create something where I could just zone out. The last few weeks (and in fact, end of last year, too) were so busy and stressful, that I wanted to find something that I enjoyed doing, but that didn't need a lot of brain power!

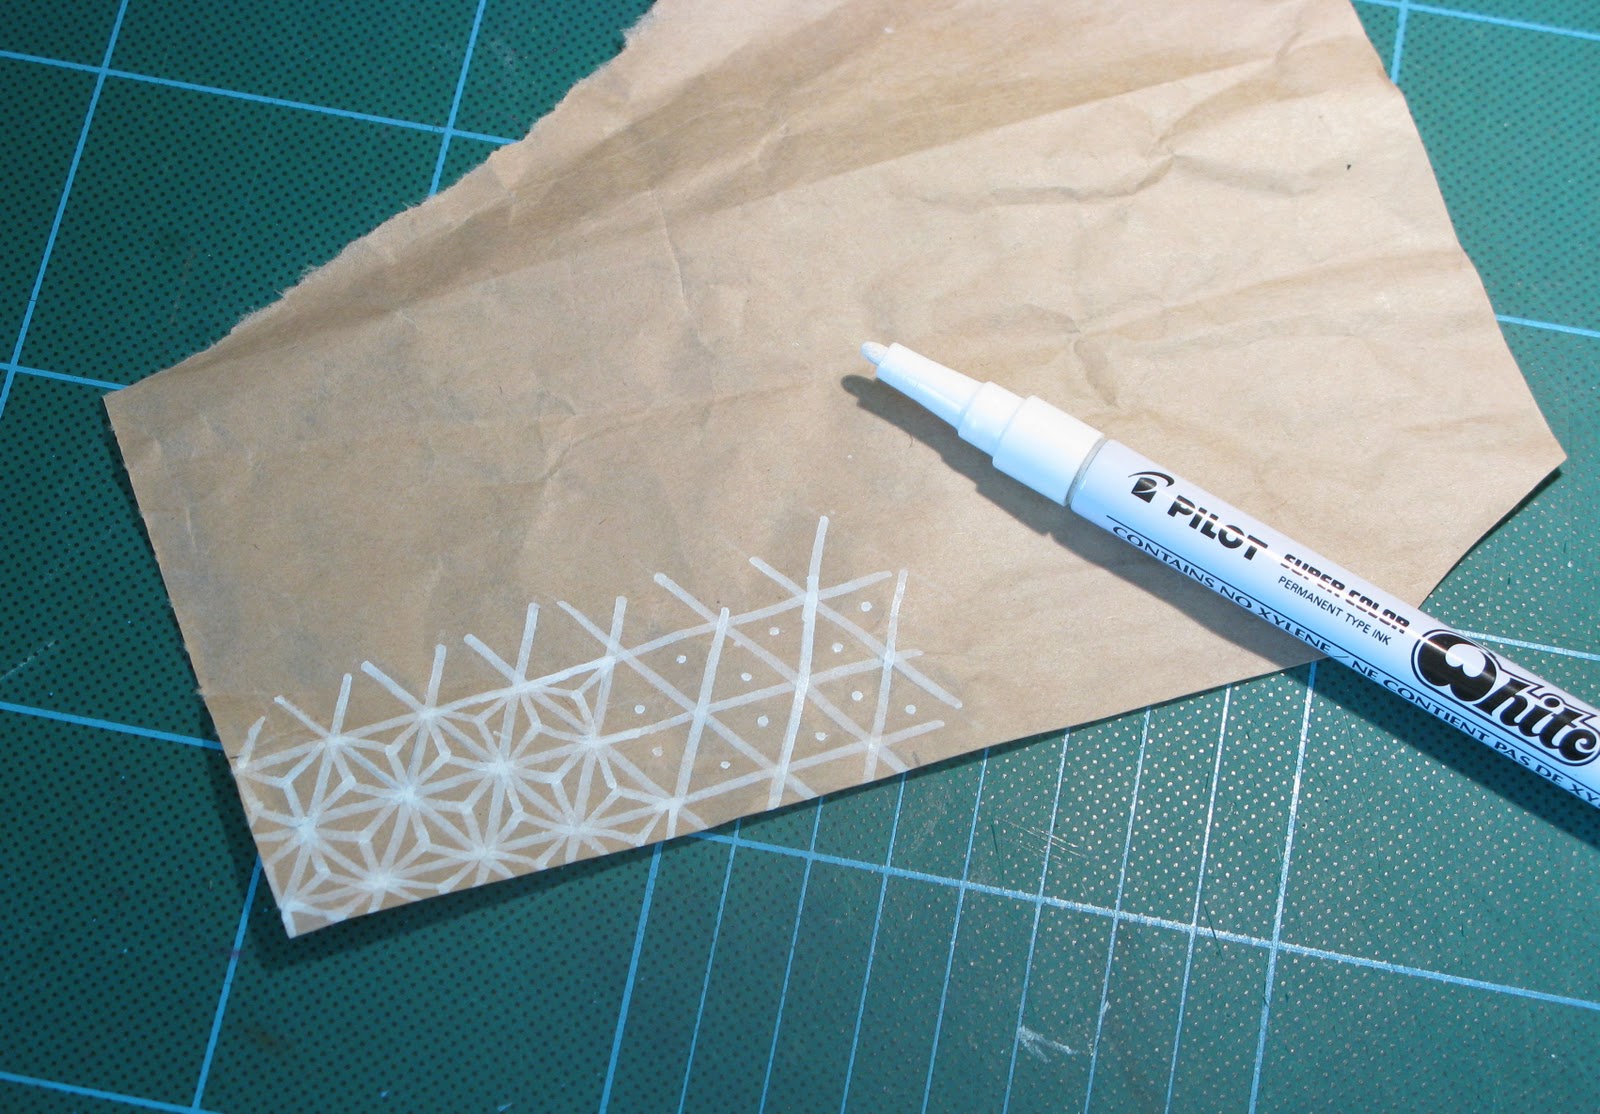
I find that doodling patterns (particularly strong, geometric ones) provides peace and the ability to completely switch off, so that's where today started.

I found a pattern I liked in amongst these free ones (which I found online here) ...

... and set about drawing it freehand on brown paper with white paint. There's something about the brown and white combination that I really love.


Once I'd spent some time drawing the pattern ... I could feel all of the stress beginning to disappear as I doodled :-)  ... I decided I wanted to use the pattern to make something. So, I searched for tutorials for Japanese paper crafts.

I came across an amazing tutorial for Japanese Papercraft Boxes on The Evil Mad Scientist blog and knew I had to try it. The tutorial is so precise and clear and they have even included a free template for the box...


... and this is how it turned out!


... and because I can't leave well enough alone, I added a quick bow that I made from left over Christmas ribbon :-)

I know you're really busy this week, writing your last paper. I hope it's all going very smoothly and that you'll soon be finished. Can't wait to see your penultimate Step, when you get a moment to do it... and then there will be ONLY ONE LEFT!!!! :-)

(I'll try and catch up this week with the post I missed. Sorry it's taking so long!)

Lots and lots of love
Fi
xx

Tuesday, January 4, 2011

Step Forty Nine: Raw chocolate Christmas bonbons

Dearest Sylwi,

Happy New Year!!!! I hope 2011 is full of love and light and dreams coming true... and lots of time for creative adventures, too!


As mentioned in my last post, I had initially hoped to cook some Christmas cookies for a Step at the end of last year. However, food guilt set in over Christmas :-))) and I made a promise to myself, that instead of a holiday completely filled with refined sugars and dairy, I would teach myself to make one raw food treat.

This recipe came from a book that I was given as a Christmas present, called 'Naked Chocolate' by Shazzie and David Wolfe. It's a recipe for fudge squares, made from nuts, dates, coconut and cacao nibs. 

To make the fudge look a little more treat-like, I rolled each square into a ball and then covered it in either shredded coconut, or raw cacao powder.


They tasted very good... not "excellent", but pretty darn good for my first adventure with raw treats. I'm looking forward to improving on the recipe a little. 

My ultimate goal is to invent raw treats that will taste soooo good, that everyone will like them... even friends who don't really understand the whole raw food concept and think it's all a bit crazy! :-) I shall certainly know I've achieved that, when my husband likes them! 

Today's Step was really two creative adventures in one. Not only did I make the treats, I also persuaded a photographer friend to show me how to light my pictures. I styled these pics, with the Christmas tree behind and an old, wooden, chopping board that belonged to my Grannie... and then I ran out of props! (and began dreaming of trips to Paris, to browse flea markets for pretty ceramic plates and saucers!) 

In the end, I just made a quick origami gift box, using these instructions. In hindsight, I should probably have left it out of the shot, but I hadn't really planned the shot, it just kind of fell together... so, well, that's why there's a weird paper box in there! heeee! :-) 

I learned so much about lighting today. We played around with lighting the bonbons from the front, then the side and then from slightly behind. The pics I liked most, were lit from slightly behind. It seemed to give the bonbons much more shape.

I'm exhausted from all of the work. This was supposed to take a couple of hours and ended up taking far longer! Especially when you're trying to take the pic and a curious and hungry puppy sneaks into the background of the shot...


... so, you shoo them out of the shot, run back to the camera and take another pic, only to discover ANOTHER curious and hungry puppy, attracted by all of the noise... and then the chocolately smell wafting down off the counter, has sneaked in to the vacant space...


:-))))

Lots and lots and lots of love to you! Happy, Happy, Happy New Year, sweetpea! 
Fi
xx

Tuesday, December 28, 2010

Step Forty Eight: Unwinding after a hectic Christmas! :-)

Dearest Sylwi

Again, I've missed a week! I crept onto our blog today to make my apologies and post... and then had to laugh when I realised you were late again too! Phew! Well, tis the season to be rushed off your feet, so what were we thinking when we said no to a little blog holiday?!

Anyway, I'm actually glad today that we said 'no!' as it forced me to do something creative when I would otherwise have been in bed sound asleep! ;-) I feel much better for having squeezed this Step in!

Last week, as you know, I was going to make Christmas cookies. When I finally did find the time though, it was too late! I'd already made a half commitment to myself to eat better and baking sugary sweets doesn't figure in that resolution. When I say 'half commitment', I'm sort of at the planning stages right now (I'm still eating an awful lot of rubbish!) but when it came to cookies my guilty conscience got the better of me. So, no cookies for last week's Step. I'll have to think of something else instead. Maybe I can find a raw cookie/cake recipe and try that instead. So, last week's Step is still outstanding... I shall post it this week (I hope!) ;-)

This week, I was looking for something quick and colourful and I found exactly that on the lovely "HonestlyWTF" blog. They've created a very cool tutorial for making friendship bracelet necklaces and I was instantly smitten by the gorgeous styling and photography of their post.

They recommend using two colours and making multiple strands. With no time to spare, I decided to do four colours on one strand! hee! ;-) So, I found a scrap of rope that began life as a handle on a bag and began winding four different colours of embroidery thread around it.


The results are gorgeous and I only wish I had longer to make others, or to turn this into something... but it's the holidays and I don't. But Yee Har! I posted something... finally! :-)))

Lots and lots and lots and lots of love to you. Hope you're having a superb Christmas! Speak sooooon!
Fi
xx

Wednesday, December 15, 2010

Step Forty Seven: Origami Christmas Tree

Dearest Sylwi

This week, I began with one idea and ended up with a completely different version of it!

For a while now, I've been fascinated by Fair Isle knitting patterns. I wanted to paint my snowflake the other week with this pattern. In fact, I wanted to paint several snowflakes with different patterns and hang them in a garland, but papier-mâché didn't turn out to be my strongest skill (ha!) and time ran out!

So, this week, I thought I'd do a simple origami Christmas tree, but use paper that I'd painted with various Fair Isle patterns to fold the tree with. Again, time ran out! Grrr! So, with no time to paint, instead, I decided to keep it simple and just make a quick origami card.

First, I folded the tree, following this origami Christmas tree tutorial that I found on "Ish" blog. It's a wonder that I got around to anything else today, once I started scrolling through Carole's beautiful blog. It's fairly addictive, browsing through all of her inspiration and ideas!

For the tree topper, I then followed this great star tutorial on the 'Extreme Cards and Papercrafting' website (where I got very distracted by a whole host of other brilliant tutorials that I'd also like to try!)

As the pentagon for the star needs to be cut out perfectly, in order to not mess up the paper folding later, I found one on Google here and traced it, just to be certain that my edges were all straight.

A bit of glue and some sparkly hearts later and ta-dahhh!


Nothing like the pretty picture I had in my head when I began, but at least I created something. And I'm FINALLY back up to date with my posts. Yahoo! :-)

I know you're busy this week, but hope you're still managing to have some fun in the run up to Christmas.
Lots and lots and lots of love to you.

Fi
xx

Tuesday, December 14, 2010

Step Forty Six: Some good news! :-)

Dearest Sylwi

I'm not only behind with my Steps, but also with this 'congratulations!' card that I should have sent off a few weeks ago!

A very special friend of mine announced that he and his wife are expecting a baby next year! Awww! So, here's the card I made for them this afternoon out of brown paper, red embroidery thread, white paint and a pencil!


The Mum-To-Be is Polish, so I was wondering if you could give me some help writing it?! Or, at least, what is the word for "congratulations!" in Polish? :-)

{ Almost caught up with my Steps. One more to do this week. I won't be posting it today though. I haven't even decided what I'm doing for it yet! ha ha! But I will post it sooooooooooon! ;-) }

Lots and lots of love
Fi
xx

Step Forty Five: A slight obsession with snowflakes!

Dearest Sylwi

Good Grief! What a few weeks?! I have no clue where time went, but it WENT! And fast. Hopefully, I can catch up with my missed posts today... that's the plan anyway!

I've missed being here. I'm so glad you were here instead, though. I dropped in to read your posts and they cheered me up no end!

I did actually make this week's Step during the correct week, but it went so horribly wrong (ha ha! I think I say that every week!) that I didn't want to upload it. I wanted to take some time to better it and ... well, then... the week's flew past and I completely missed last week's post, so I realised, that I have to upload it ... in all of its imperfect glory! ;-)

So, here it is! Snowflakes again! I'm obsessed with them.

Somewhere on the web {which of course, I can't find now I want to give credit! I'll keep looking and add in the link, when I find it!} somebody blogged about a project they did where they cut 2 identical letters out of cardboard, stuffed in between them with paper and then covered them with papier-mâché! The result was large, solid letters that could be painted.

I thought I'd get adventurous and try the same technique with snowflakes. I had a zillion ideas buzzing around my head about how to do them and how I could paint them and even lots of different ideas for how I would use them... garlands for the Christmas tree or fireplace, window decorations, gift tags, hanging mobiles and so on! :-)

It all started out quite well. I cut out a typical snowflake shape from cardboard twice...


... and glued on little rolled up pieces of tissue paper for the stuffing.


I then glued on the second piece of cardboard and was ready to begin with the papier-mâché.


... which is (a) where it all began to go wrong and (b) where I forgot (in my panic) to take any pictures of the unfolding disaster! heeeee! ;-)

I quickly realised my snowflake was far too small for wrapping wet, gluey newspaper around! It would have been much easier to wrap a larger snowflake. It was very fiddly and quickly became a bit too wet and mushy!

I'm sure if I had more patience, or skill (this is my first time with the papier-mâché technique) that I could have made this work, but I was really beginning to get quite annoyed! Not least, because it was all taking so long. I'd forgotten that each layer needs to dry before you can apply the next.

I didn't get around to painting or collaging it - apart from a quick, messy coat of white. And so, this is where my snowflake adventure ended. A hugely time-consuming project for... well... a bit of a disappointing result. However, I did learn infinite amounts about papier-mâché and its (or should I say, "my") limitations...


... and despite the mess, I did actually really enjoy the project, for the most part! Although, I think I'll stick to buying my Christmas decorations in future! ha ha! :-)


Lots of love
Fi
xx

Tuesday, November 23, 2010

Step Forty Four: It's beginning to look a lot like Christmas!

Dearest Sylwi

Ever since I saw your Step Six on creating stamps, I've wanted to have a go myself!

Last week, I ordered the rubber stamp material and a carving tool and was thrilled when it arrived in time for this week's Step!

Inspiration for my stamps this week, came from the extraordinary website of Wilson A. Bentley, Snowflake Bentley, in the shape of images like these...


By adapting his camera to work with a microscope, back in 1885, Wilson Bentley became the first person to photograph a snowflake.

He went on to take more than 5,000 photos of snowflakes during his life, forming a collection of exquisite images, all of them different. It's really an extraordinary collection!


"Under the microscope, I found that snowflakes were miracles of beauty; and it seemed a shame that this beauty should not be seen and appreciated by others. Every crystal was a masterpiece of design and no one design was ever repeated., When a snowflake melted, that design was forever lost. Just that much beauty was gone, without leaving any record behind."
~ Wilson "Snowflake" Bentley, 1925


First, I traced the snowflake in pencil, simplifying its shape, ready to carve...


I transferred the pencil snowflake onto the stamping mat by placing the drawing, pencil-side down and rubbing the back of the tracing paper with a ruler.


When I began carving, I realised I didn't have quite the right tools for the job. I didn't realise the cutters came in different designs! My cutter had a hook on the end and was quite large, whereas I think yours (and Gennine's) were almost like thin scoops? 

I was too far down the line to back out, though. I used the smallest blade in the pack, but it was a bit too clunky for the delicate design of the snowflake. However, I did the best I could! 


I had meant to do three, but ran out of time! :-) So, two it was...


I used the stamps to cheer up a gift tag, the outside of an envelope and also, created a liner for an envelope. 

I found fantastic instructions for envelope liners here, at Paper Source. They sell liner templates, but I just created my own.


Have you had any snow yet? None for us here, but the temperature has really dropped and is set to plummet further over the coming days, with a possibility of a dusting of snow! Yipee! 

Well, when I say "plummet", I mean we might get into single digits! Gee we might even hit zero! ha ha! 

I think "plummet" is more what it does on your side of the Atlantic! :-)

Lots and lots and lots of love
Fi
xx

Tuesday, November 16, 2010

Step Forty Three: Layering Paper

Dearest Sylwi

There's so much I want to write for this post, but my eyes are so tired, I'm going to take it easy and make a list instead!

I found out this week that the reason I've been getting so many headaches and sore eyes is that I have a little inflammation in both eyes, but also, that I'm becoming long-sighted! After 38 years of perfect vision, my eyes are beginning to fail me! So, I'm going to have to get reading glasses. Till then (and till the inflammation clears up), I'm trying to spend as much time offline as I can. I debated not posting today, but habit kicked in and I thought I'd do a quick upload. It's all a bit scrappy, quite frankly, but never mind! hee! ;-)

Anyway, here's the list...

The pros:

- this is something I've wanted to try with paper for a while
- I found this beautiful vintage flower pattern in a great free source of embroidery patterns online, so I could get on with cutting, rather than trying to design my own flowers first
- I really enjoyed embossing the paper and layering it
- using tiny little adhesive foam pads to build up the layers of paper worked really well
- I'd like to continue exploring other ideas with this technique. Not sure what exactly!
- I really enjoy working with brown parcel paper.

... but...

The cons:

- I'm not sure I like the contrast of white paper against the brown (although, I've discovered that I love white paint on brown paper!)
- I loved the first flower in the centre, but as I kept adding to it, I started to dislike it! It started out much better than it finished! ha ha!
- it doesn't look that great from the side, as you can see the foam stickers behind the flowers
- I'm too tired to play around with lighting to take a photo of it tonight. I hope you can kind of work out what I was trying to do
- I had intended to do the black bits with thread, but had no time, so just inked them! (cheat! ha!)


Sorry to hear you had such a rough week last week. I'll be back to write much more tomorrow and to comment properly on your post.

Hope you're okay. Lots and lots of love,
Fi
xx

Tuesday, November 9, 2010

Step Forty Two: The World's Most Evil Cartoon Character ;-)

Dearest Sylwi

Today, I had intended to try out Cyanotype, a method of photographic printing using UV light that produces beautiful, blue prints. However, it turned out to be a very unco-operative, grey, November day. The sun appeared briefly this afternoon, but not for long enough to try printing, so I had to come up with a Plan B!

I decided instead to try something I've wanted to do for ages, but have been putting off through fear! Creating a cartoon character. :-)

Last week, I signed up for Nanowrimo intending to write a novel about my rescue dog. I do, as you know, have plenty to scream about of stories to tell on that subject! After only 3 days and 4,500 words though, I ran out of steam! :-( I literally couldn't think of one more single word to write about her! :-)

I did begin to think, though, that rather than trying to force her unwillingly into a novel, she would make a funny subject for a comic strip. Drawing out her naughtiness could be a good (healthy) way for me to vent my anger. ;-)

I searched on the t'internet for lessons on cartoon drawing and came across this superb book, "Cartoon Animation (The Collectors' Series')" by Preston Blair and before I knew it, it had arrived in my post box! Damn that "one click!" feature on Amazon! :-)

So, for today's Step, I set about coming up with a cartoon character for my dog... more commonly known as "that damn Shelter Dog!"


It was sooooo hard to draw her face. Oh my goodness. I drew and drew and drew and hated all of them. None of them looked anything like her. So, I decided to stop trying to do the hardest bit first and drew her body, closely following the instructions in Blair's book.


Ok, so ignore the face! That looks nothing like her! The body, I took from the instructions at the top of this pic - you can just see them at the top right. You draw 3 circles for the body, then 4 ovals as paws and then just connect them to create a dog.

It was amazing to see it all coming together in front of me. Me, who can't draw, drew that there (shelter) dog. Yes, it took me ages, but gee! It was fun! :-)

I changed the paws and legs a bit to make them more like my pup's, but otherwise it was just a direct copy of Blair's body. This totally captures my pup when she's in trouble, though. That stance - hee hee! That is HER through and through!


The body was relatively simple, but I took FOREVER to draw her face! After ages of frustrating drawing and rubbing out, I took a break for an hour... and when I came back, I sat down and drew her face first time!

Then it was time to crack open the watercolours and get to the fun bit, the colouring in...


I was really pleased with it ... and then I took another break for an hour. When I came back, I realised that her nose was the wrong shape... and if she was slinking around like this after being bad, both of her ears would be pinned flat to her head...

So, there's still a lot of work to be done to create her. I really loved playing with this today, though. Using ink and watercolour (even though I don't really know how to paint with watercolour, or understand how to create shadows yet) was sooooo much fun.

How on earth cartoonists draw comic strips though, I'll never understand. It took me so long to come up with just this... I couldn't imagine how long it would take to write a whole strip! :-)

Ten Steps to go. Yikes! How quickly a year goes past! Can't wait to see what you come up with this week (if you have any time?!) :-)

Lots and lots of love
Fi
xx

Tuesday, November 2, 2010

Step Forty One: A Spooktacular Pumpkin Garland! ;-)

Dearest Sylwi

This week I decided to do something Halloween themed. I wasn't going to bother, as it's a couple of days late, but today when I sat down to create, I changed my mind.

I sprained my ankle last week, so had a very boring weekend. I spent it propped up on the sofa, with my ankle on ice and I feel as though I completely missed the fun of Halloween. I didn't go out and we weren't visited by any guisers, so it almost feels like it didn't happen! :-(

My initial idea was to create Jack-O'-Lanterns, using old tin cans with holes cut in them and tea lights inside. The idea might work, but it quickly became apparent that it wasn't going to work for me today! I made a big ol' mess of a tin and the edges were extremely jaggy and dangerous, so I decided to try something a little easier! :-)

I know I made paper garlands a few weeks ago, but for some reason, I didn't get them out of my system! :-)

I tried cutting a paper chain of pumpkins, but by the time I had folded the paper, concertina style and attempted to cut through all of the layers, I realised it was too fiddly.

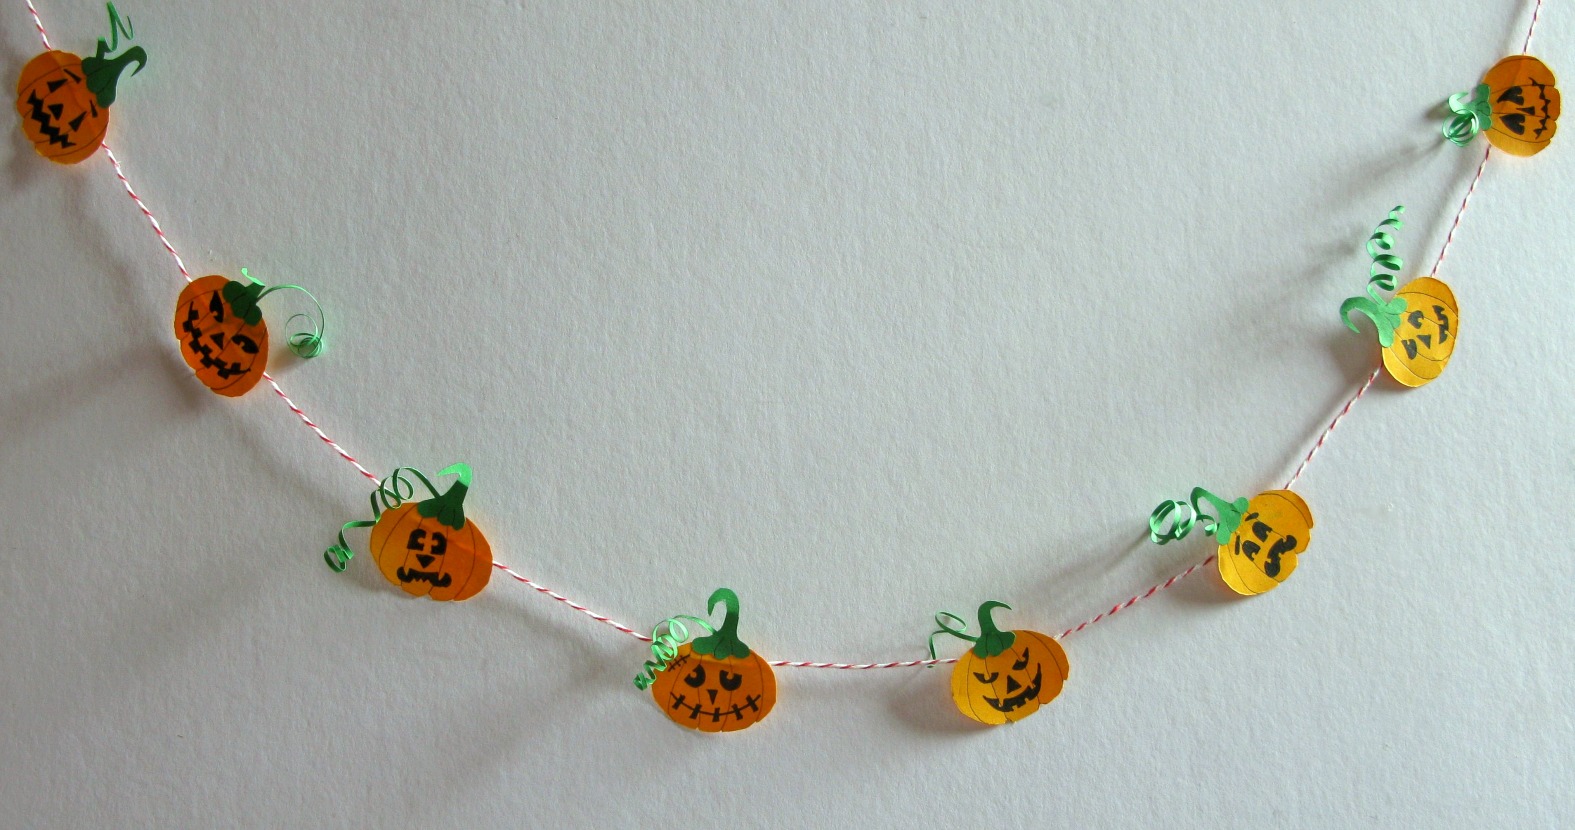
So, I cut a very basic pumpkin shape instead and individually drew on the details and faces. I thought at first it was going to be too much work and very boring indeed, but drawing different faces on each pumpkin turned out to be so much fun. More fun than pumpkin carving (where you only get one shot to carve the face) and nowhere near as messy!


After I had drawn the faces, I cut out some stalks and quilled some thin strips of green to make spindly tendrils...


... and then glued them to my pumpkin heads.

*Eep!* "Please don't give me a hideous hairstyle like the others..."
 I didn't have time to create a pretty set up over which to hang my pumpkin garland...


... which unfortunately meant that the above photo looked fairly boring!

I'm determined that just once during these 52 Steps, I'm going to create a properly styled backdrop for one of my photos! :-)

But, not today!! :-))

However, I did put some effort in and tried to jazz up my pumpkins a bit, by using them as a gift wrap tie.


I'm so glad I did this today! I now feel like Halloween happened and the Jack-O'-Lanterns and their different faces / personalities made me laugh as I drew them!

Right, I'm off to do some more work on the novel I'm writing! {mwah ha ha ha haaaaa!} Not really. I just like saying that!

Well, maybe sort of.

I AM writing a novel, but not one I ever think will be published. I've signed up for NaNoWriMo (National Novel Writing Month). The goal is to write a novel during the month of November - specifically 1,667 words every day, for 30 days, starting on the 1st of November.

Yesterday, I wrote 1,723 words and the high I experienced on finishing, verged on euphoric! :-) However, this morning, I wondered how I shall even write 100 more words on the same subject, let alone 1,667... for 29 more days! :-) ha!

{hee hee! Now, I know how you feel when you're writing your papers!!} ;-)

Whatever the outcome, it feels like a great way to squish my inner critic and write freely for once. To do, rather than just dream... a bit like this 52 Steps challenge! :-)

How was your Halloween? What did you get up to? Did the kids (and you!) love it?!

Lots of love
Fi
xx

Tuesday, October 26, 2010

Step Forty: A step back in time!

Dearest Sylwi,

Inspiration for today's Step came in the form of a 'sort of' anniversary! :-) My husband proposed to me in Paris, nine years ago today... I know it's not an 'official' anniversary, but I still like to remember the day and call it an anniversary. It drives my husband mad sometimes. He finds it hard enough to remember all of the other birthdays and anniversaries, without me adding to the list with made up ones! heh heh!

Anyway, the day was very romantic and funny and we have such great memories of it. Nine years ago, right now, we were standing on a bridge in the middle of Paris, the sun going down behind the Eiffel Tower, me a bit drunk (I knew something was up, so had insisted on a mini bar crawl on the walk down to the bridge to give me some Dutch courage!)

I was in such a fluster as he proposed that I couldn't stop talking and changing the subject, until he eventually told me, quite rudely, to "just shut up!" :-) He proposed with two rings - one was a cheap, 'back-up plan' ring, in case the real engagement ring wasn't delivered to him on time.

So, jokingly, declaring that 2 rings was fairly unnecessary, I pretended to throw the real ring over my shoulder into the Seine... and being a bit drunk and flustered, I really almost did! I managed to fumble it back into the safety of my arms though and to this day, we still laugh about his face when he thought I'd thrown it off the bridge! Yipee for happy memories!

Although, on reflection... and I do mention this to him often ;-) ... in all of the excitement of almost throwing away my engagement ring, I don't believe I actually said, "Yes!" to getting married. Hmmm... maybe there is still time to get out of it?! ;-)))

Browsing Flickr for images of the Eiffel Tower, I came across the gorgeous Photostream of pilllpat (agence eureka).

Full of beautiful French inspiration, it was there that I found a paper template of the Eiffel Tower. 

I had meant to make a 3D version, by cutting 4 sides and gluing them all together, but doing one side took longer than I expected, as I got a bit taken up with adding thread and pinholes and playing with the beautiful shadows...

I poked the pinholes on the wrong side, by mistake, so they look a bit messy here! *sigh* :-)
With time running out, I then somehow got side-tracked and made a pop-up card, instead! ha ha! :-) (Welcome to the random workings of my mind!)


It all went rather horribly wrong and didn't turn out at all as I envisaged, but in the true spirit of 52 Steps, I'm saying, "Who cares?!" Vive l'imperfection! heh heh! :-)

It was such a lovely surprise to see that you beat me to posting today. You did an amazing job of catching up. I can't believe we're at Step Forty, either! :-)

Gosh, I feel happy, sad and panicky about it, all at once! Happy that it will soon be over and I won't have to stress every week about what to do. Sad that I feel I've come so far and learned so much and that it will soon all be over. Panicky because I don't know what I'm going to do for the remaining 12 steps, but I feel like I should make them count somehow! ha ha! :-)))


Lots of love, hugs and kisses to you,


Fi
xx

Tuesday, October 19, 2010

Step Thirty Nine: Celebrating origami with paper fireworks!

Dearest Sylwi

No words this week, just pictures! :-)

I could write an entire post on how tired, empty and 'oversubscribed' to everything I'm feeling at the mo... but I won't! heee! ;-) Instead, here's a pretty, distracting, little origami project for this week's Step.

Inspiration came from this amazing tutorial video from jonakashima on YouTube. Beautifully clear instructions and ...with a little patience, (not my strong point, grrr!) ;-) surprisingly simple to put together!

Origami Firework (by Yami Yamauchi)


Yipee!

Lots of love,
Fi
xx

Tuesday, October 12, 2010

Step Thirty Eight: A 'Fairytail' Ending :-)

Dearest Sylwi,

Where are yooooooooooou??! :-) Please come back! I miss you.

This week's step was a strange one for me. The influence came from a trip I made at the weekend to see my Grannie, who has Alzheimer's.

The other day, I read someone describe an Alzheimer sufferer as "the opposite of a ghost". Their body remains, but their spirit has long gone. I'm not sure I truly believe that, as I could strongly feel my Grannie's spirit, even though it could easily be described as "not being there".

Or, maybe it was just the comfortable familiarity of being surrounded by her things - her furniture, the vases and photographs on the shelves, the way her room smells of warm sunshine, coffee, soap, geraniums and biscuits, with a base note of hospital detergent... I found it difficult to determine the difference between spirit and memories. It's certainly not something to dwell on in the moment, or you would be overcome with feeling sorry for yourself, which is surely the most unhelpful emotion in these situations.

Anyway, it was a strange couple of days and when I returned I began sewing this illustration, free-hand. Almost as if it was a page from a storybook... I don't really know why I chose any of the individual elements, or if it particularly makes any sense, it was just what came pouring out of my head! :-)

It felt like a comforting story - where the spirit goes on ahead, like my dogs do on our walks... I lose sight of them for a while, but they're always standing there, waiting for me when I round the corner.


Lots of love,
Fi
xx

Tuesday, October 5, 2010

Step Thirty Seven: Step by Step Sushi :-)

Dearest, darling Sylwi,

If you could only see what I had planned for today and how woefully short of the mark I am, you would laugh very hard and long. I had sooo much planned. I wanted to do a Japanese themed 'step' and had big visions of the actual project that I created today, plus an elaborate photoshoot - all styled with Japanese props, a collage of patterns, and a couple of other ways of presenting my project that I wanted to try.

Instead... I managed the basic project and then these very simple pics have sat on my computer screen all day, since about 11am. It's now getting on for 6pm... and I'm trying to write this post in-between all the nonsense I have to get done today. I think I'm currently averaging about 10 words an hour! hee! :-) Maybe next week, I can produce the other parts to this step that I wanted to do...?

The inspiration for today's creation came from The Complete Book of Sushi, by Hideo Dekura, Brigid Treloar and Ryuichi Yoshii.

I've been desperate (for a very long time) :-) to make sushi, which I LOVE! Well, all sushi apart from anything that involves sea urchin - yeuch! :-)

I had a go a couple of months ago and the results weren't terrible, but I'd really like to improve my techniques and with something so creative and fancy, practice is the only way to get better.

So, here's what I got up to for today's step.

First, I placed a sheet of toasted nori onto a rolling mat... using toasted nori is (I think) very important. Last time, I used untoasted and oh my goodness, the texture was so rubbery, it was inedible. It was like biting into a car tyre! :-)

At least, I think it was because I used untoasted... or maybe it was just a bad brand of nori. Apparently, the different qualities of nori in Japan are akin to paper - you can buy all kinds of different grades, from cheap to extremely expensive.

Anyway, this time, working with toasted turned out brilliantly.


I prepared the sushi rice early this morning and have a bunch of instructions on how I did it, but most sushi rice packets have instructions on the side, so it's easiest just to follow those.

Once cool, I began spreading a thin layer of rice onto the nori. To stop the rice from sticking to my hands, I regularly dipped my fingers in a bowl of water to keep them moist. 

Last time, I made the mistake of making my fingers too wet and unfortunately, this transferred to my rice and nori. It all ended up a bit soggy and unruly! Thankfully this time, I knew to shake the excess water off my fingers before applying them to the rice and it worked perfectly.

At the top, I pushed the rice right to the edge and at the other end, I left a line of exposed nori (not covered in rice) about an inch wide, along the bottom of my nori sheet.


I made a groove along the top of the rice and drew a very thin line of wasabi paste along it...


Then it was time for the fun part - the filling! 


I didn't have time to go to the fish shop to buy fresh fish, so I bought some precooked prawns and added avocado and chives. I wondered if the filling would be too soft, so added some cucumber for crunch.

Then it was time to roll...


... all the way over, tucking in the edges of the nori as I went and lifting the edge of the mat up...


Once rolled, I dabbed some water along the one inch exposed part of the nori to act as 'glue' and sealed the sushi shut. Once sealed, I slightly squared the edges of the roll...


... and then it was time to cut! 


Using a very sharp knife and wetting it with water frequently, I cut even(ish)! sized pieces... 

A friend was here for lunch, so it kinda went, "the big one, that's for me, this little one, that's for you, this next big one, that's for me..."  ;-P


... then a quick arrangement on the plate with a blob of wasabi shaped into a leaf... and I mean quick! I barely got this shot, before pieces began disappearing off the plate! :-)

I could not believe how delicious these were and how fast my friend and I wolfed these down. They were supposed to be for lunch, but I finished making them around 11am and by 5 past 11, they were all gone!

It was so wonderful to get creative with food. It felt as though so much love and care goes into these - it makes them super special. The freshness of the ingredients, the beauty of the presentation and how delicious they taste make them hard to beat!

The possibilities are endless as well. Vegetarian sushi, raw sushi, traditional sushi with raw fish - all the different ways to roll them; inside out, hand wrapped, thin, thick, upside down... oooh, I have an addiction coming on! :-)

I'll be back first thing tomorrow morning to catch up with your post and also to comment on last week's post. I've just seen it today, as I was uploading this post. *sigh* I know, you told me you'd uploaded it, but I haven't had a chance to visit all week. I can't wait for tomorrow, to spend some time browsing your lovely work. I Misssssss Yooooou! 

Lots and lots of love
Fi
xx